Run Walkthrough
Summary
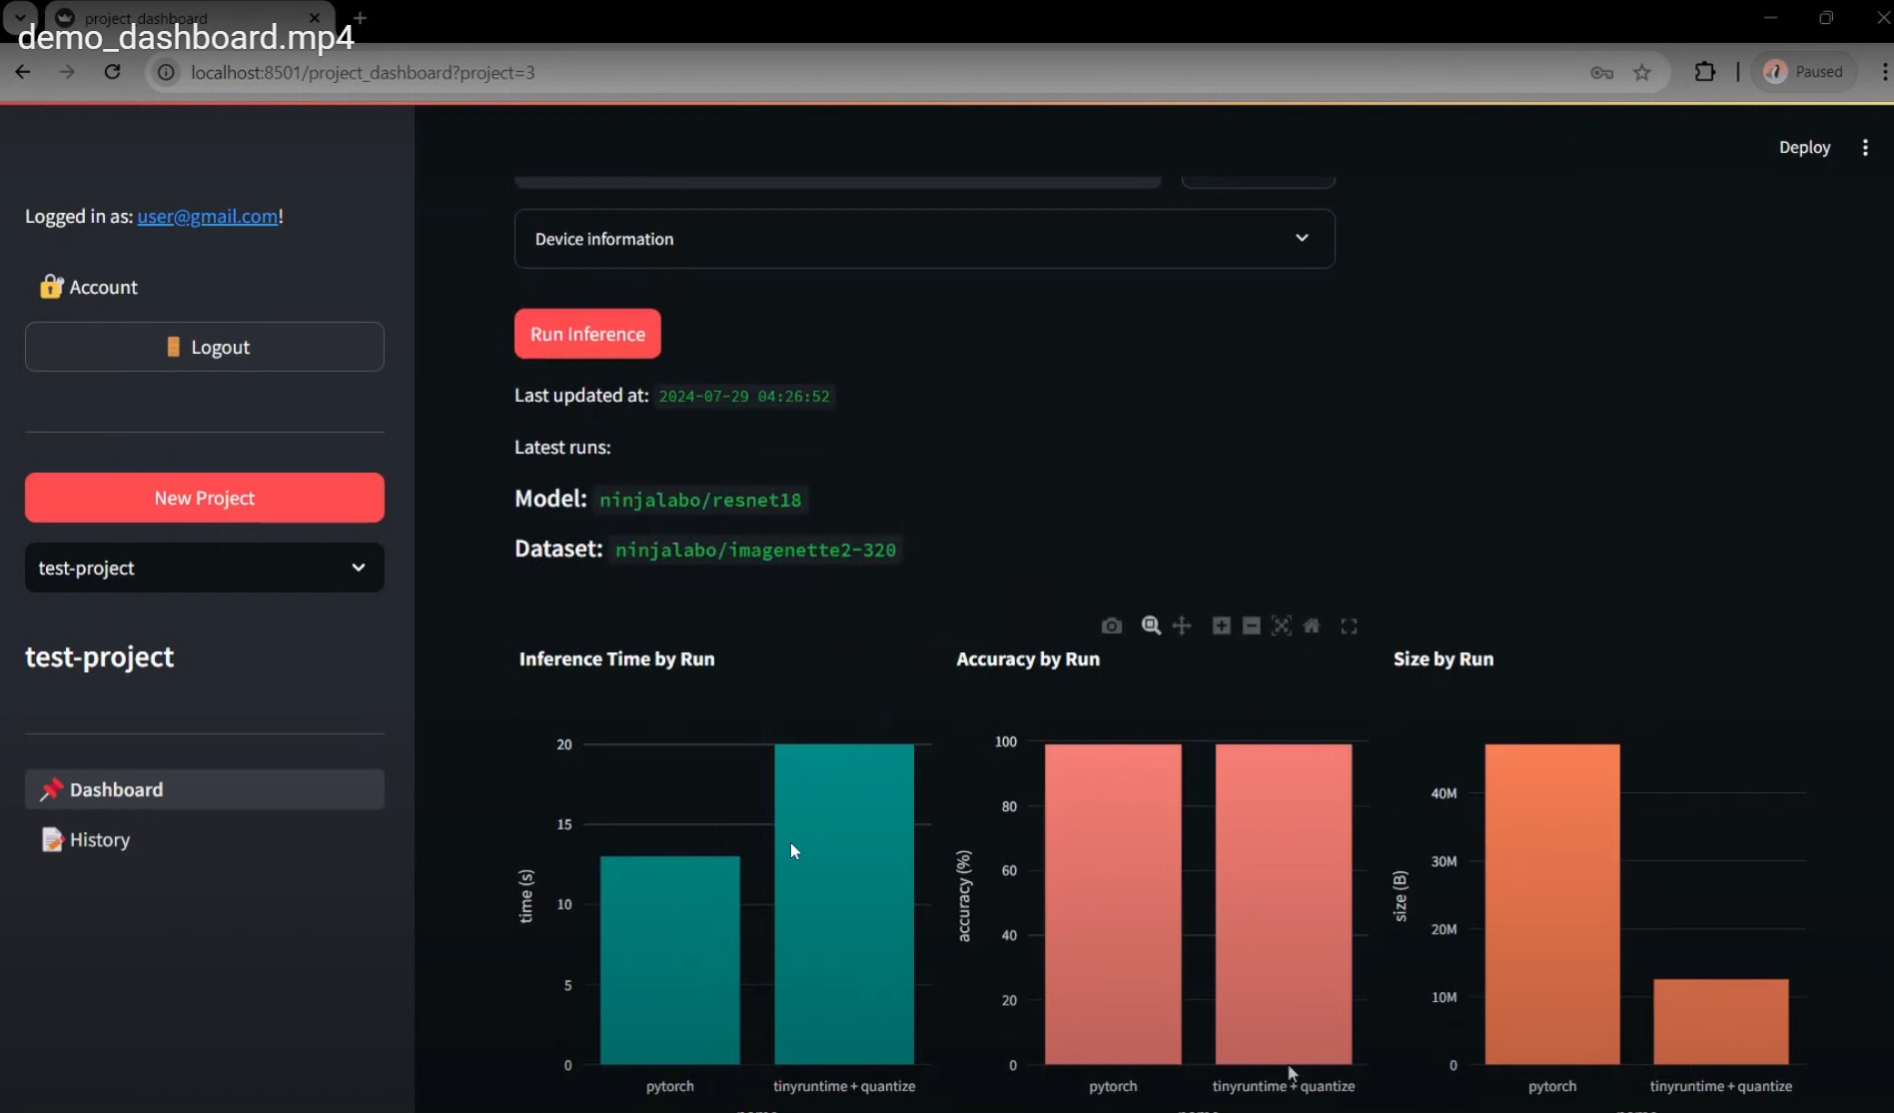
The video tutorial is directly obtained from our internal review process of MVP6. It covers the process of creating and reviewing two default runs via project dashboard. Starting with user registration, the current MVP creates a default project and redirects the user to the project dashboard, in which page the main operation takes place. With the project dashboard, the user can specify a model and a dataset to run inference on a selected device. By default, two versions of this inference task are executed (forming two separate runs): a version that uses the original model for inference via Pytorch runtime, and a version that uses a quantized model (8-bit quantization) via tinyruntime (our custom runtime). After both runs are finished, the frontend provides visualizations to compare the results (accuracy), speed, and size of the model for each inference task.
Features Breakdown
Registration & Project Setup
The registration process in MVP6 is simplified, only requiring the user’s email address and a secure password. Email verification is yet to be implemented at this stage. After a successful registration, the user is redirected to the project dashboard with a default name and description, both of which can be modified later on. New projects can be created via sidebar button, which requires a unique name and possibly some description. Different projects can be selected also via the sidebar, which navigates to the project dashboard page of the corresponding selected project.
Model & Dataset Selection
We are currently using models and datasets uploaded to Hugging Face Hub. The user can choose any publicly accessible models or datasets from Hugging Face. However, the currently recommended ones are our own uploaded models (ninjalabo/resnet18, ninjalabo/resnet34, and ninjalabo/resnet50) and dataset (ninjalabo/imagenette2-320) for consistency in directory structure and accepted file formats.
The user can also upload models and datasets to our own UI, which accepts a model file model.pkl and a dataset file in .zip or .tar.gz format. For convenience, the user can download our example model and dataset to easily test this feature without compatability issue.
Device Selection
The user can setup and select an edge device in which the inference task(s) shall be executed. The user can register a device with information including its architecture, connectivity details, memory and storage limits, and installation option. Currently, we are supporting devices with arm64 or amd64 architectures, in which the model will be installed in the form of a Docker image in our VM. The model will be optimized to the selected device, and its performance on it is measured and reported (accuracy, execution time, and model size).